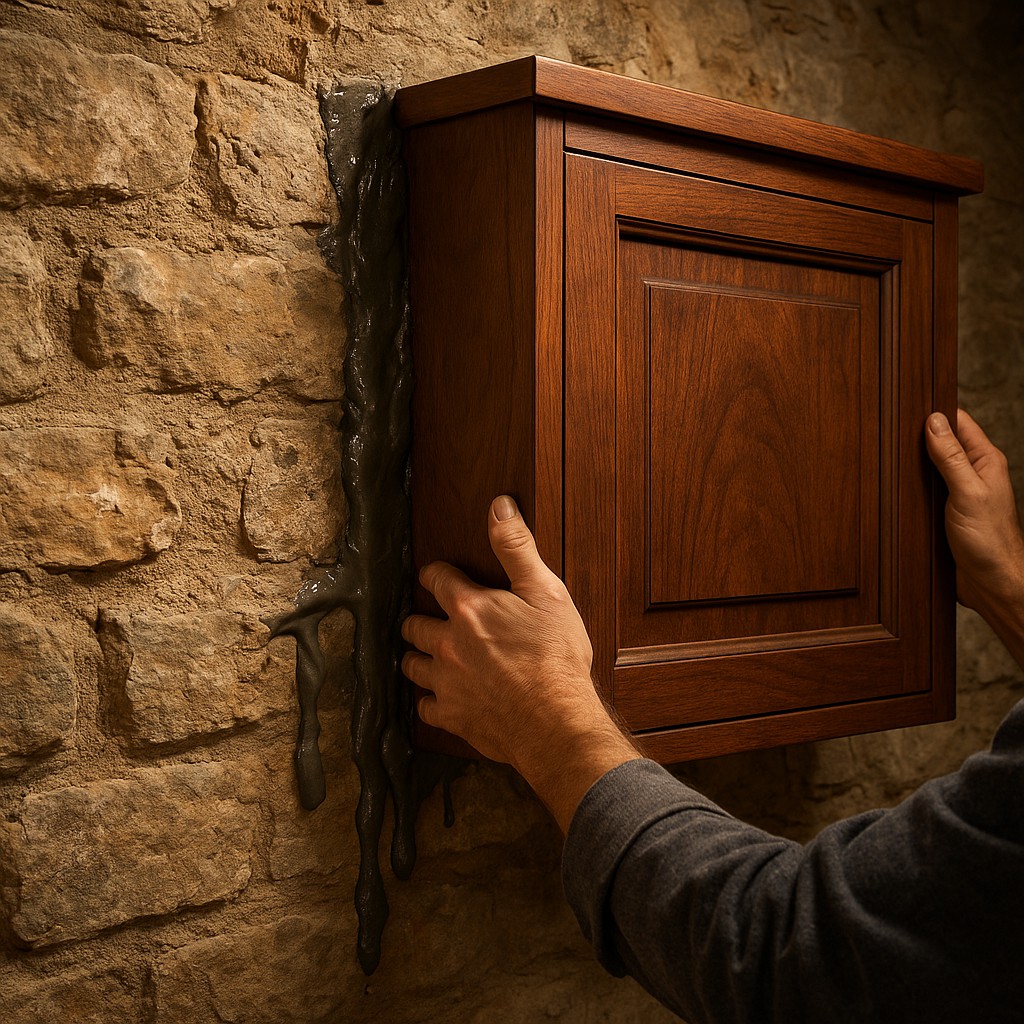
Imagine you are standing in an old farmhouse or a historic stone cottage, holding a high-end, custom cabinet that cost a small fortune. You press it against the wall, ready to bolt it down forever, only to realize the wall is about as straight as a mountain trail. There are gaps large enough to swallow a smartphone, and the masonry surface is a chaotic landscape of bumps, pits, and jagged edges. If you try to use traditional wooden wedges or plastic shims to bridge those gaps, you will quickly find yourself in a structural nightmare. Wood shims will likely compress under the heavy load, or worse, they will snap because they only touch the wall at two or three tiny spots, leaving the rest of the cabinet hanging in a state of unstable tension.
This is the moment where most amateurs start to sweat, but a seasoned pro simply reaches for a bucket of structural adhesive or high-strength epoxy mortar. They are about to perform a bit of construction magic known as "wet-shimming." This technique flips the traditional logic of leveling on its head by trading rigid, pre-formed spacers for a fluid, moldable material that creates a perfect "negative image" of the wall's flaws. Instead of fighting the uneven surface, wet-shimming embraces it, filling every microscopic void and creating a bond that is often stronger than the wall itself. It is a masterclass in how a liquid state can lead to the ultimate solid foundation, representing a shift from mechanical fastening to chemical structural support.
The Engineering Logic of Total Surface Contact
To understand why wet-shimming works so well, we first have to look at how weight and force behave in a standard installation. Imagine a heavy steel beam resting on three tiny pebbles on a concrete floor. Even though the beam is massive, all that weight is concentrated into three minuscule "point loads." This creates incredible stress on those specific spots, which can crack the concrete or cause the beam to shift as the pebbles settle. Traditional shimming works on this same flawed principle. You shove a few pieces of plastic or wood into the gaps, and while the cabinet looks level, its entire weight is actually "point-loading" on those few shims. Over time, vibration, humidity changes, and the simple force of gravity can cause those points to fail, leading to sagging or wall damage.
Wet-shimming solves this by replacing point-loading with "area-loading." When you apply a thick, gooey bead of structural epoxy or specialized mortar to the back of a fixture and press it into place, that material acts like a fluid. It is squeezed out of the high spots and forced into the low spots. As it flows, it maintains contact across 100 percent of the surface area between the fixture and the wall. Once that material hardens, it becomes a custom-molded gasket. Because the load is now spread across thousands of square inches instead of just three or four points, the pressure at any single spot is drastically reduced. This is the difference between standing on a frozen lake in high heels versus snowshoes; the more you spread the weight, the safer and more stable the system becomes.
This transition from fluid to solid also allows for a level of precision that mechanical shims can only dream of. When you are working with a "wet" shim, you have a window of time where you can micro-adjust the fixture. You can nudge it a hair to the left or tilt it a fraction of a degree until your spirit level tells you it is perfectly vertical. The adhesive holds it in place through suction and surface tension while you make these fine-tuning movements. Once you hit the "sweet spot," you simply let the chemical reaction take over. The material cures into a rock-hard interface that mirrors the exact shape of your specific installation.
Selecting the Right Chemistries for the Job
Not all "goop" is created equal, and choosing the wrong material for wet-shimming can lead to a messy, expensive failure. In the world of high-performance trades, the most common materials used are structural epoxies, epoxy mortars, and non-shrink grouts. A standard construction adhesive you might find at a local hardware store is often too thin and shrinks as it dries. For a wet-shim to be effective, it must be "dimensionally stable," meaning that as it changes from a liquid to a solid, it doesn't lose any volume. If the material shrinks, it will pull away from the surfaces, leaving the very gaps you were trying to fill and defeating the purpose of the whole exercise.
Structural epoxies are the gold standard for heavy-duty jobs because they have incredible strength under pressure and stick to almost anything. Some specialized epoxy shimming compounds, often called "chocking" compounds, are designed specifically for industrial machinery. These materials can withstand millions of pounds of force and the constant rhythmic vibration of an engine without cracking or losing their grip. For lighter architectural work, like mounting stone fireplace mantels or heavy cabinetry, a sand-filled epoxy mortar is often the best choice. The sand acts as a filler that prevents the epoxy from flowing too quickly, giving it a "thixotropic" quality-meaning it stays exactly where you put it until you apply pressure to move it.
On the other hand, if you are working with masonry-to-masonry connections, such as leveling a heavy stone slab on a concrete base, a non-shrink cement-based grout might be the right tool. These grouts are made with expanding agents that fight the natural tendency of cement to pull inward as water evaporates. This ensures the bond remains tight against both surfaces. The choice depends entirely on the weight of the object, the chemistry of the wall, and how much time you have before the material sets. If you use a five-minute epoxy on a job that takes twenty minutes to level, you are going to have a very bad, very permanent day.
A Comparative Look at Shimming Strategies
When deciding how to approach a leveling project, it helps to see how wet-shimming stacks up against traditional methods. Each has its place in the toolbelt, but for specific high-stress scenarios, the fluid approach is often the clear winner.
| Feature |
Traditional Wood/Plastic Shims |
Professional Wet-Shimming |
| Surface Contact |
Limited to small points (point-loading) |
Full-surface coverage (area-loading) |
| Load Distribution |
Highly concentrated stress |
Evenly distributed stress |
| Adjustment Level |
In small steps (based on shim thickness) |
Infinite micro-adjustability until set |
| Vibration Resistance |
Low (shims can vibrate loose) |
High (dampens and absorbs energy) |
| Durability |
Vulnerable to rot, compression, or pests |
Proof against moisture and decay |
| Reversibility |
Easy to remove and readjust |
Permanent once cured; requires demolition |
| Complexity |
Simple, fast, and inexpensive |
Requires prep and chemical knowledge |
As we can see from the table, while traditional shims are great for a quick window installation or a light interior door, they lack the structural strength required for heavy loads on irregular surfaces. Wet-shimming is a more "expensive" technique in terms of time and material costs, but it provides a level of security that mechanical fasteners simply cannot match. It essentially turns two separate pieces of material into a single, solid structure.
The Art and Geometry of the Installation Process
The actual process of wet-shimming is a delicate dance between physics and timing. It begins with "dry fitting," which involves placing the object against the wall without any adhesive to identify the largest gaps and the high points. This is a critical step because you need to know exactly how much material you require. If you apply too little adhesive, you will end up with hollow spots that weaken the hold. If you apply too much, you will have a massive cleanup project as the excess mortar oozes out of the sides like toothpaste from a tube. Masters of the craft often use "limiters," or small, hidden spacers, to ensure they don't press the object too far back, maintaining a minimum thickness of the wet shim for maximum strength.
Preparing the surfaces is the next non-negotiable step. No adhesive, regardless of how strong it is, will stick to dust, oil, or loose crumbling stone. In masonry, this usually means vacuuming out the pores of the stone and sometimes applying a primer to ensure the "wet" material can soak into the surface and create a mechanical grip. Once the adhesive is applied in thick beads or dollops (often called "daubs"), the piece is pressed into place. This is where the magic happens: as you push the cabinet or beam into the wall, you can feel the resistance of the fluid material. You use your levels to find the perfect alignment, watching as the material occupies every nook and cranny.
One of the most satisfying parts of this method is the "suction" effect. Because the wet shim fills the entire space, it creates a partial vacuum if you try to pull it back. This helps hold the weight of the object while the material cures. However, for very heavy items, temporary mechanical supports or "cleats" are still used to prevent the object from sliding down the wall before the chemicals have a chance to harden. It is a process of patience. You set it, you check it, you double-check it, and then you walk away. The fluid is doing the work of a thousand tiny, perfectly sized shims, settling into a permanent state of support.
Navigating the Permanence of Chemical Bonds
One of the most important things to remember about wet-shimming is that it is fundamentally a "one-way street." With traditional screws and wooden wedges, you can always back out the screw, tap the shim a little deeper, or start over if you realize the cabinet is slightly crooked. With wet-shimming, once that epoxy or mortar has cured, the installation is, for all intents and purposes, part of the building's skeleton. If you realize the next morning that you were five degrees off because your laser level was calibrated wrong, you won't be reaching for a screwdriver; you'll be reaching for a jackhammer or a grinding wheel.
This permanence is why the technique is often reserved for high-stakes projects where stability is more important than future flexibility. It is also why professional installers use "slow-set" materials. You want a product that gives you sixty to ninety minutes of work time. This allows you to step back, get a fresh pair of eyes on the project, and make sure everything is perfect before the chemical "point of no return." It turns the installation into a high-pressure performance where preparation is 90 percent of the work, and the actual "wet" phase is the final, decisive act.
There is also the matter of cleanup. Because you are working with thick structural liquids, some "squeeze-out" is inevitable. If you are mounting a beautiful mahogany cabinet against a dark stone wall, you do not want gray epoxy oozing out and staining the wood. Pros often use painter's tape to mask off the edges of the fixture and the wall before they even open the adhesive. They allow the excess material to squeeze out, wait for it to reach a "peanut butter" consistency where it is no longer runny but not yet hard, and then trim it back with a putty knife for a clean finish that looks like the fixture grew naturally from the wall.
The Philosophical Shift in Modern Craftsmanship
Beyond the technical specs and chemical formulas, wet-shimming represents a fascinating bridge between ancient masonry and modern science. Thousands of years ago, builders used lime mortars to level massive stones in cathedrals and fortresses, understanding instinctively that a fluid interface was the only way to join two irregular objects. Today, we have replaced those lime mortars with advanced epoxies that can support skyscrapers and high-speed turbines, but the underlying principle remains the same. We are using the adaptability of liquids to overcome the stubbornness of solids.
This technique teaches us that rigidity isn't always the best path to stability. In many engineering contexts, the most "rigid" systems are the most brittle, prone to snapping under stress because they cannot spread force effectively. By introducing a fluid connection that later solidifies, we create a system that is perfectly tailored to its environment. We aren't forcing the wall to be flat, and we aren't forcing the fixture to bend; we are creating a third element-the wet shim-that acts as the perfect mediator between the two. It is a solution that values harmony and fit over brute force.
As you move forward into your own projects, whether you are hanging a heavy mirror on a brick backsplash or installing a structural post on a concrete floor, remember the power of the "wet" approach. It reminds us that sometimes, the best way to build something solid is to start with something that flows. When you master the art of the wet shim, you stop fighting the imperfections of the world and start using them to your advantage, creating installations that are not only level but truly, deeply connected to the structures around them. There is a profound confidence that comes from knowing your work isn't just sitting on a few flakes of plastic, but is supported by a custom foundation built to last as long as the building itself.